|
Sheet metal for art work is considerably different from
sheet metal for modern uses that were developed since the industrial revolution.
Art sheet metal working in gold, silver, pewter, brass and copper includes
repousse and raising while modern sheet metal working is mostly duct work which
is folding and
body work (like on autos) which includes rolling to shape. Art metal work
results in work hardening so the metal must be heated and annealed - a
slightly different process for each kind of metal - to avoid cracking the
brittle metal. |
|
|
 I
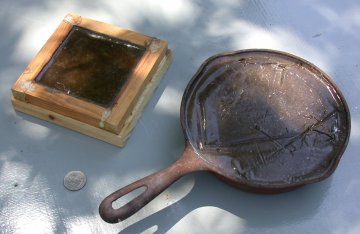
bought pitch from
Northwest Pitchworks and made a working
surface by melting it into a small cast iron fry pan as well as nailing and
gluing edge pieces on a 3/4" board and pouring some in there. I
bought pitch from
Northwest Pitchworks and made a working
surface by melting it into a small cast iron fry pan as well as nailing and
gluing edge pieces on a 3/4" board and pouring some in there. |
|
Chasing is working the design from the front, normally to add
detail or to refine the shapes produced by repousse. (The word is also used for
the finishing work done on cast sculptures.) |
Sinking is forming metal by hammering it against a shape or using
tools to form the metal. The shape might be a sandbag or a bowl or an outline
of a more complex form. The tools can be anvils or specialized spring
shapes that rebound to form through openings. The metal normally becomes
thinner as it is stretched into shape.
Glossary of
sheet metal working. Once formed, the metal is smoothed by planishing -
hammering with a very smooth flat hammer face against a shaped wood surface.
Pictures below show a small sandbag I made beside a planishing hammer and
various shapes and materials - brass and steel - that were sunk against (another)
sandbag. 2009-08-30 Larger metal curved forms can be done with hammering,
but the English Wheel
is a preferred tool. 2012-11-19 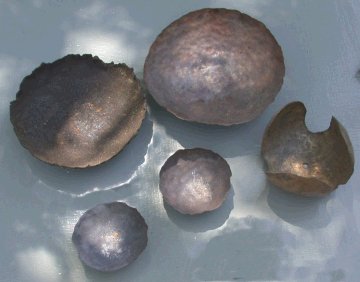 |
|
Raising is forming metal by hammering repeatedly off an anvil so
it tends to bend and fold, but working the bends before the fold to hammer it
down into itself, thus becoming thicker. As strange as it seems to me at
times, by increasing the thickness you make a bowl close in around its center.
Raising on Internet |
|
Forming sheet metal can also be
done over a wooden mold, against a bowl or dome shaped log end or against a
sandbag. I sewed up a couple of small and moderate size using tight weave
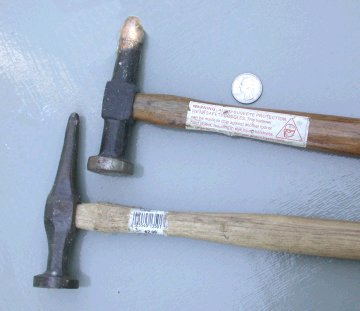
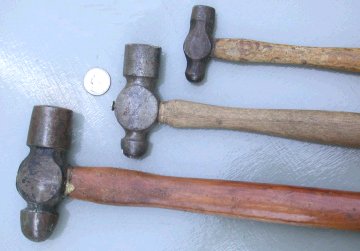
canvas and play sand and did a couple bowls. 2009-08-19 Photos show pick
hammers for auto body repair and ball peen hammers in 3 sizes for general work. |
|
Commercial sheet metal working is divided into folding and seaming used in air conditioning duct work sheetmtl.htm and body work used in repair and reconditioning autos and airplanes. There are a number of heavy tools used in these fields including shears for cutting, brakes for bending, English wheels for curving as in making fenders. Air conditioning sheet is invariably galvanized steel. Body work sheet is normally plain weldable steel. Irvan-Smith Inc. - English Wheels English Wheel: Information From Answers.com |
|
--------------------------------------------------------------------- http://www.loneprairie.net/Education/image_transfer_techniq.htm ink jet printer image transfer I- a method for water based ink jet image transfers [MF note: now that inkjet inks are becoming more waterproof, this may no longer work as well. 2006-07-09] Materials:
Steps:
This method was given to me over email. "It produces an interesting transfer with rich colors and sometimes adds an unusual texture." ink jet printer image transfer II- a method for water based ink jet image transfers Materials:
Steps:
Note: I have been experimenting with ways to use my ink jet printer as part
of my art. This is the transfer method that I have come up with so far. I have
tried a variety of methods and substances, but I seem to get the best results
with rubbing alcohol. Having said that, I have to say that I am not fully
satisfied with the resulting image transfer, as it is very faint, not detailed,
and has a harshness about its color. I also do not expect it to be light-fast.
I am still experimenting with different ways to use the ink jet images. If
anyone out there has, for some reason, come upon a better method, please
share it with me. |